Operation Agreement was a failed British attack against Tobruk conducted on 13-14 September 1942. The operation included land, amphibious forces, and various secondary operations.
The Plan
Operation Agreement was grandiose by design, zealous in aim. It contained the key elements of subterfuge and bravado that many British war planners and policymakers admired, not the least being the top policymaker himself, Winston Churchill. The undertaking, an attempted ‘surgical’ strike intended to strangle the supply line of the surging Deutsch-Italienische Panzerarmee, would end as an unmitigated disaster for the Allies.
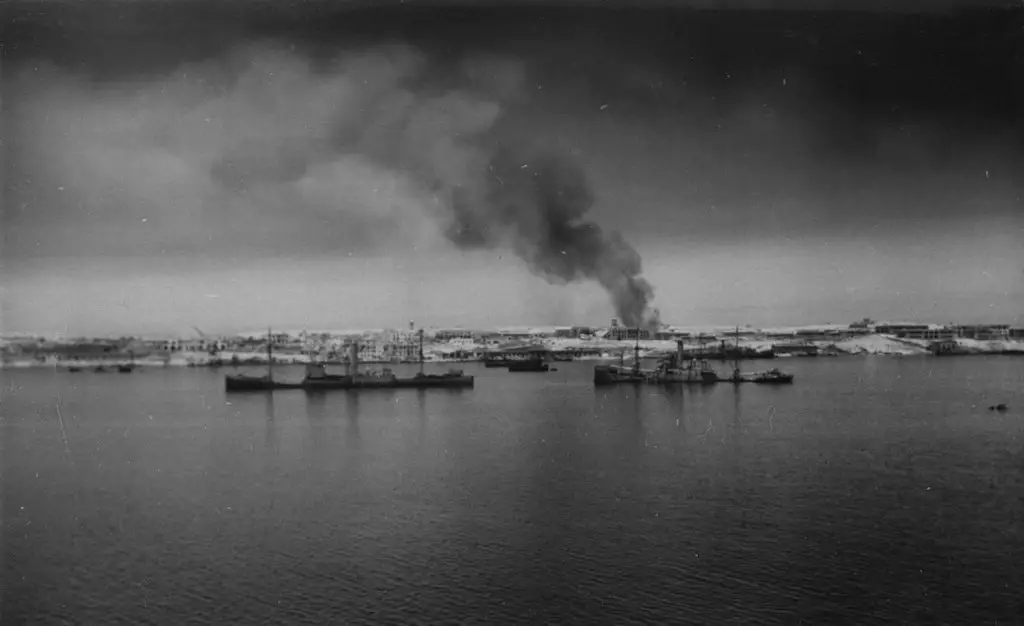
Port of Tobruk, June 1942.
At the heart of Operation Agreement’s downfall was the plan itself. The separate yet coordinated missions, historically grouped under the umbrella of Operation Agreement, were based upon a hodgepodge of ill-conceived initiatives. Most of which failed to receive the proper support necessary to achieve their desired results. The over-ambitiousness of the Allied objectives concerning the assets employed, along with other factors including underestimation of the opponent, failure to learn from past military mistakes, and over-reliance on deception and confusion, undercut the determined fight put forth by the British and Commonwealth forces called upon to carry out the operations.
Nevertheless, one should be mindful of attributing the entire Allied failure to poor planning and lack of foresight. A highly skilled and tenacious response by both Italian and German forces confronted, repelled, or decimated the attackers on every level of the sprawling battle zone. With fighting raging on the land, sea, and air, Axis troops continually got the better of the resourceful and brave British marines and soldiers they faced. They ensured this British-led misadventure ended in a complete rout. With hundreds of men wounded, captured, or killed, along with several Royal Naval vessels sank, Operation Agreement resulted in an overwhelming Axis victory.
By the fall of 1942, the war that stormed across North Africa for the previous two years quickly approached its crescendo, the Battles’ of El Alamein. Erwin Rommel’s Deutsch-Italienische Panzerarmee and Bernard Montgomery’s Eighth Army were now engaged in a life and death race aimed towards building and strengthening their own forces and supplies in preparation of the looming, and confrontation. The race between the sides was, in reality, not even close.
Supplied and supported heavily by their United States ally, FDR’s self-proclaimed “Arsenal of Democracy,” the British easily outpaced the Axis effort in this endeavor. They possessed an overwhelming advantage when the showdown commenced in fuel, armor, ammunition, and just about all other logistical needs. This advantage would prove impossible for the Axis to overcome.
The Allies were not, however, going to take any chances. The fortunes of war had shifted too often for the British to take anything for granted. The British, rightly or not, had almost exclusively attributed these precautions to one man. “Rommel, Rommel, Rommel. What else matters but beating him“! Churchill had lamented after a crushing British loss to the Desert Fox in June of 1942 at Gazala. The Field Marshal’s shadow appeared to loom from the distant North African desert, all the way to 10 Downing Street in London.
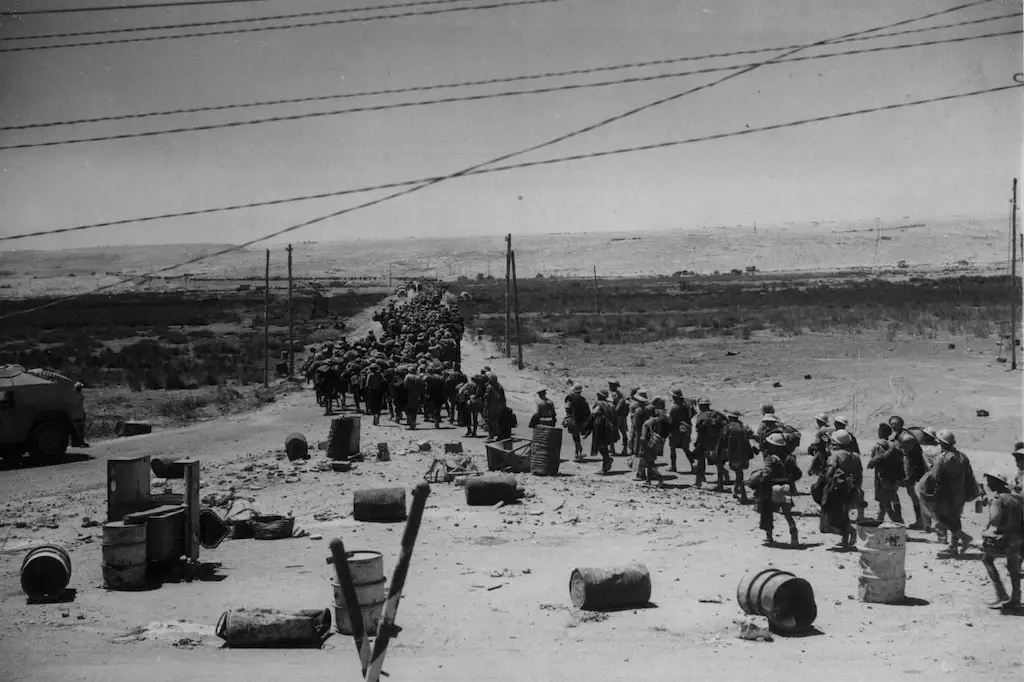
A column of British Prisoners of War in Tobruk, 1942.
By denying Rommel’s Panzerarmee of fuel and materials the Italians were attempting to deliver through the Allied defensive screens in the Mediterranean Sea, the higher the likelihood of its defeat. To facilitate this defeat, British strategists identified critical Axis ports in Benghazi and Tobruk as prime targets to strike a crushing blow to the overextended Axis supply route.
Benghazi, located in the Italian colony of Cyrenaica, and Tobruk, Libya, were crucial to the Axis cause for supplying the advancing Deutsch-Italienische Panzerarmee. Any significant delay experienced in the receiving, unloading, and transferring of supplies to and from these ports would have dire consequences on the Axis ability to win the war in the desert.
The harbors’ location, well behind Axis lines, obviously prevented a major military strike at the time, and previous aerial bombing attacks achieved limited success. Thus, the British turned their eyes towards a form of more ‘unconventional’ warfare to accomplish their task; ‘commando’ raids. Perhaps more than any other combatant, the British continually looked to small, elite forces to conduct quick strike type of operations to accomplish important objectives.
The results achieved on these ‘specialty’ type missions were mixed. While ‘raider’ operations had success in most theaters of the war where British boots were on the ground, a fair share had failed.
Operation Flipper, the 1941 plan to land British commandos behind Axis lines in North Africa to hunt and kill Rommel, ended as a fiasco. Nearly every participating British soldier was killed or captured. Likewise, the August 1942 attempt to seize the port in Dieppe, France, ended in an outright disaster. The ill-planned and under-supported raid left over 3,600 Allied troops, mostly Canadian, killed, wounded, or captured. Over 30 British vessels sank, including a destroyer, and the bloody attack failed to achieve any of its primary objectives.
These failures would not deter the British from attempting another such strike. According to author Peter C. Smith, what would likewise continue was the British proclivity of “muddling through” the details of an operation instead of reliance on a more structured and defined process of operational planning. The failure to employ such methods once again had devastating repercussions for the British mission.
Although risky, the British military hierarchy felt that an attempt to disrupt the enemy’s lifeline to their needed supplies was well worth any potential losses. The British had their eye on attacking Tobruk as far back as the beginning of the desert war in 1940 when the Italians first held the city. Over two years later, the strategically located harbor still held a pivotal role in the theater and occupied the British’s attention. The planned assault against Tobruk would be the centerpiece of the raider operations.
The following is a summary of the operations:
Operation Agreement: Attack on Tobruk.
Slated for September 13/14, 1942, the strike against Tobruk was the largest of the “Agreement “operations. The harbor was to be assailed by land, sea, and air. Three strike forces, two scheduled to arrive by sea (Forces A and C), one from across the desert (Force B), were to clandestinely penetrate the Axis harbor defenses, and coordinate their attack against the port in the early hours of the 14th. This assault was to be preceded by a Royal Air Force (RAF) bombardment carried out by both bomber and fighter aircraft, scheduled to occur form 9:30 pm on the 13th to 5:00 am on the 14th.
During the Dieppe raid, the RAF conducted a similar ‘preparatory’ air attack. Post-operation analysis indicated there were negligible positive results achieved from the bombing. The findings concluded that the ‘warning’ the air raid gave to the defenders contributed heavily to the operation’s failure.
These determinations seemed to have been ignored by the planners of Operation Agreement. The belief that the potential damage and disruption an air barrage may inflict on the harbors defenders was worth the risk of potentially tipping their hand of a pending assault.
Once the three forces (A, B, C) perforated the Axis defenses, the mission called for the raiders to cause as much destruction as possible to the harbor’s facilities and stores, along with any vessels within, before escaping. Primary targets for the Agreement strike forces included fuel storage and pumping works, port machinery, repair shops, and ammunition storage facilities. A particular emphasis in the plan went towards the capture or destruction of German F-lighters. These are AA equipped ‘naval ferry barges’ the Axis relied heavily upon for the unloading of supplies at the harbor.
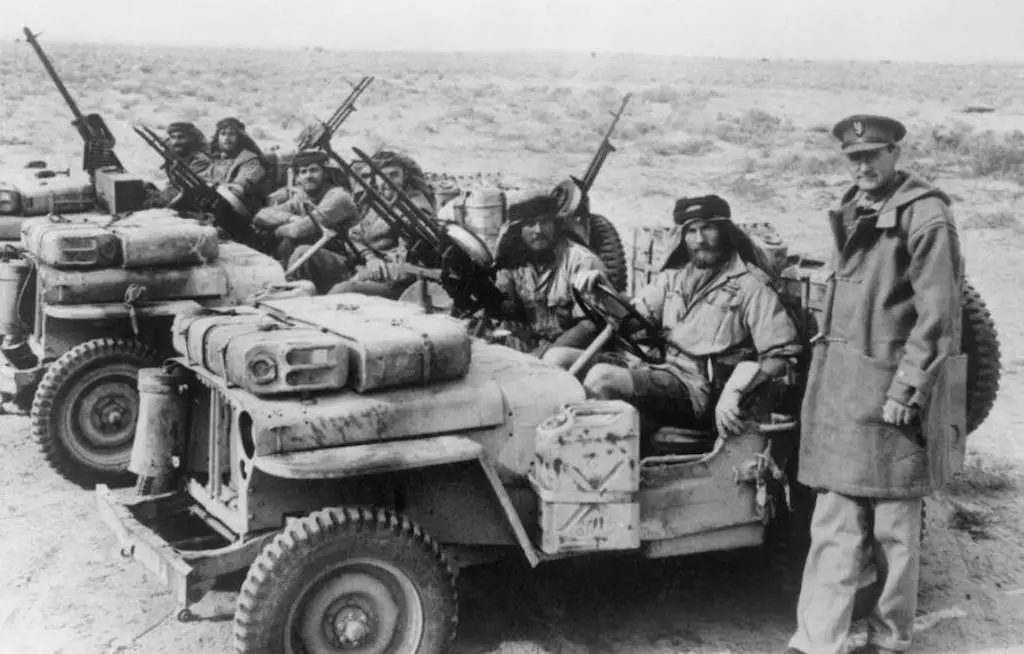
LRDGE and SAS Jeep Patrol. On the right is David Stirling, founder of the SAS.
Force B, the “land force,” was to depart from the Kufara oasis, and make its way to Tobruk via Sidi Rezegh. This assault force included 83 men, mainly elite British Special Air Service (SAS) and Long Range Desert Group (LRDG) soldiers, traveling in eight 3 ton trucks. After an expected ‘quiet’ journey across the desert towards the target, deception required ‘bluffing’ their way past the outermost ring of Tobruk security.
British intelligence was aware that small groups of sentries manned the advance approaches to Tobruk, so they designed a ruse to ‘feign’ their way past these points. Both Allied and Axis forces commonly used captured enemy vehicles. They hoped the perimeter guards would assume the British trucks in the convoy were ‘captured’ Allied vehicles containing British Prisoners of War (POWs).
Several German-speaking soldiers, wearing captured German uniforms, would lead in the truck convoy containing the POWs. Hopefully, pass through any roadblocks unchallenged, allowing the force to roll straight into Tobruk, Trojan Horse style.
Once inside the outer perimeter, they were to head to Mersa Umm Es Sciausc inlet and help silence the coastal and antiaircraft guns in support of Force C’s amphibious landing. They were then to help facilitate the landings of Force C by signaling and marking the landing zone for the approaching seaborne vessels, ensuring the arrival of these vital troops.
Force A consisted of an amphibious assault team spearheaded by the 11th Battalion, British Royal Marines. Their portion of the operation was to begin offshore under cover of darkness. The British submarine Taku was to disembark two small boats in the waters to the north of Mersa Mreira and shuttle an advance team inland to the designated landing zone. Once ashore, the advance forces were to use signal lights to mark the beach to help guide in the subsequent main contingent of Force A marines.
The 11th Marines should arrive in two waves, approximately 1 hour before dawn, carried to their objective onboard assault boats and slaved barges launched from the destroyers Sikh and Zulu. Once assembled, the Royal Marines were to move out, likewise counting on assistance from the RAF’s pre-assault bombardment. Then they were to engage and destroy gun batteries, fuel stores, and the German F-lighters. They would also attempt to capture AA guns intact later to direct them against the expected Axis air response.
After the marines silenced the coastal guns, the destroyers Sikh and Zulu were to make their way into the harbor and assist with the mission via their massive firepower. Later, retrieving the troops after the operation. In an attempt to ‘fool’ Axis forces, the British destroyers had Italian markings painted onto their structure and received orders to make smoke and “leak” oil over their sides once inside the harbor.
Hopefully, these acts confuse the counterattacking Axis pilots into thinking the destroyers were damaged Italian vessels. This idea seems quite laughable, and one must wonder how the British naval hierarchy ever approved this idea.
Rounding out the British contingent was Force C, about 200 men strong, the second scheduled amphibiously transported group of the operation. The force was to be conveyed to their targeted area, the inlet of Mersa Umm Es Sciausc, aboard several Motor Torpedo Boats (MTB). Once ashore, they were to meet up with Force B, who, as noted, needed to establish signal beacons to help guide in the MTB’s, and begin operations against the port. Force C was made up primarily of soldiers from the British Fusiliers and the Argyll and Southern Highlanders.
However, the defenders of Tobruk were not merely sitting around unprepared. They were quite aware of the importance of the harbor to the Axis lines of communication. Protection at Tobruk could be counted upon by Italian and German air, sea, and land forces.
German defensive responsibilities were lead by General-Major Otto Deindl. Deindl’s units included the entirety or elements of the 613 Motorized Military Police Company. He also had two companies of Wachbataillon Afrika, the Motorized 909 Pioneer Company, and several AA groups with approximately four dozen legendary, and lethal, 88 mm Flak guns.
At the time of the attack, the Italian garrison force fell under the command of Rear Admiral Giuseppe Lombardi, who happened to be at the installation on inspection. The regular garrison commander was away from the port at the time of the attack. Thus Lombardi was the highest-ranking Axis officer overseeing Tobruk’s defense during the Agreement assault.
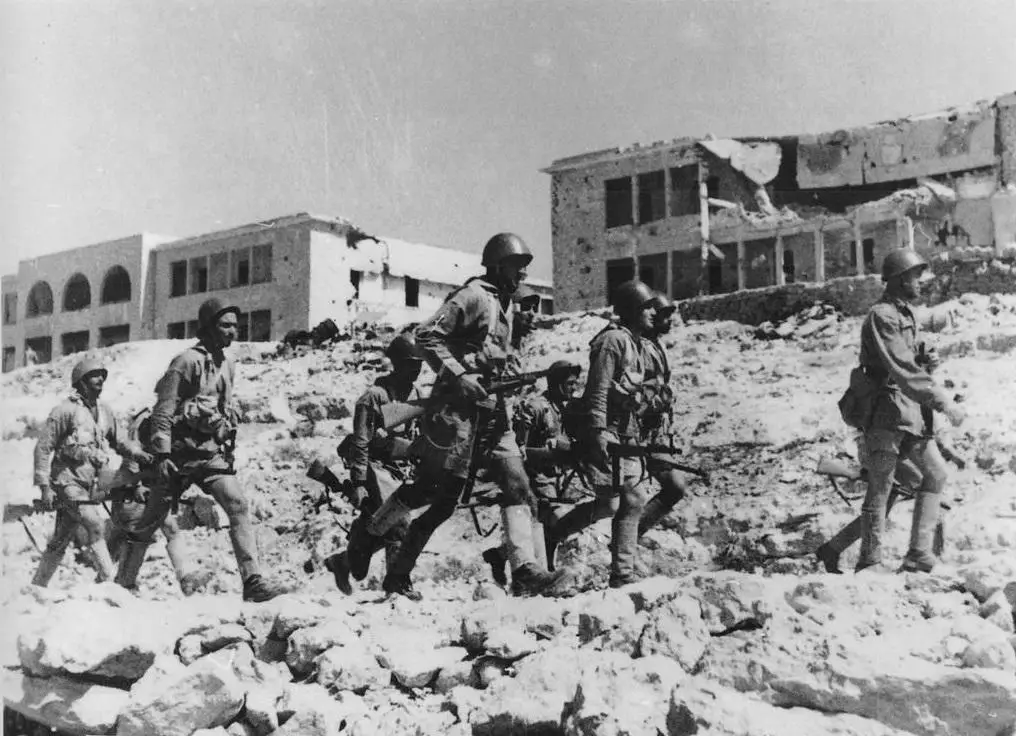
San Marco Marines Regiment in Tobruk, 1942.
As with the Germans, there was a potpourri of different Italian units stationed at Tobruk, with the 18th Cg. RR Carabinieri Battalion and the crack marines of the 3rd Battalion,’ San Marco’ Regiment, was serving as the harbor’s central defenders. The crushingly effective fight put up by the San Marco Marines during Operation Agreement earned them the nickname of the “Tobruk Battalion” for all eternity.
The able Lieutenant Colotto commanded the approximately 160 men strong, ‘San Marco’ Regiment. It had been only a few weeks that the San Marco Regiment conducted their own ‘behind the lines’ operation. The Marines, transported east down the coast from the harbor, were successfully dropped off undetected behind British territory. They made their way inland and proceeded to cut a rail line that ran between El Alamein and Alexandria.

A color photo of the Macchi C.202 Folgore attached to the 81ª Squadriglia, 6° Gruppo, 1° Stormo CT in Libya (1942).
The Axis would also be able to call upon a strong, and as it proved dominating, air contingent for Tobruk’s defense. Among the aircraft scattered about on surrounding airfields were dozens of Italian Macchi C. 200 Saetta fighter-bombers, Savoia-Marchetti SM.79 Sparviero bombers, Fiat CR.42 Falco fighters, and the excellent Macchi C.202 Folgore fighters. German aircraft included Junkers JU88’s and Messerschmitt Bf 110 heavy fighters. Also, several more JU88’s and the legendary JU 87 Stuka dive-bombers were available from Crete and Sidi Barrani.
What would further emphasize the numerical Axis dominance in the air was that after the initial RAF bombing run, British forces would have no further air support over Tobruk during the operation. The inevitable supremacy in the skies by Italian and German aircraft would carry dire consequences for the attackers.
Three Italian destroyers, along with several other German and Italian coastal vessels were stationed in the harbor. This array of daunting firepower should have been enough to give one pause on pursuing a commando-style attack against the installation. But the wheels put in motion would not be stopped, and the garrison of Tobruk and the attacking soldiers of the United Kingdom had a date with destiny that September night.
The Secondary Operations:
Operation Bigamy, the Benghazi Raid.
The “simultaneous” raid against the port at Benghazi was to be conducted strictly by land-based forces, with a portion of the attackers traversing nearly 1,000 kilometers of desert to reach their destination. The main strike force was codenamed Force X and consisted of LRDG and SAS patrols. Force X transportation comprised of 40 jeeps armed with Vickers guns and several three-ton Ford trucks.
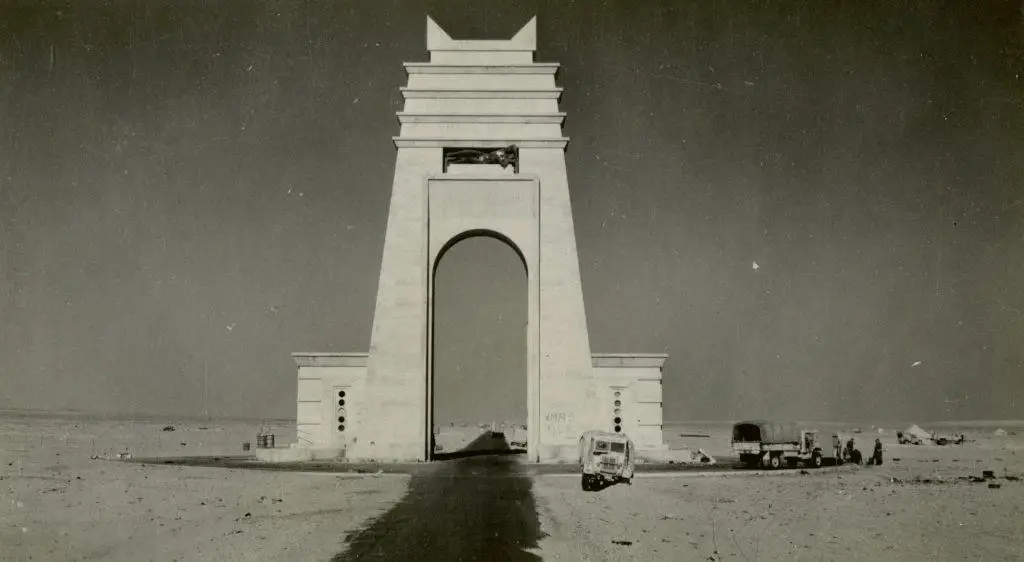
The famous Arco dei Fileni on Via Balbia as it looked in 1943. Image Credit: Ms. Patricia J. Williams
Upon reaching the Benghazi area, the convoy was to travel down the main road, Via Balbia. Relying on stealth and surprise, they would assail the harbor to render it temporarily inoperable. Targets included oil storage and pumping stations, cranes, general port facilities, and sinking as many Axis vessels as possible to block the port from the ability to accept future traffic.
Upon completion of the mission, Force X was to pull back to the Gialo oasis and assist the Sudan Defense Force in capturing the fort located within from the 200 strong Italian contingents holding it.
Attack against the Airfield at Brace
The Italian airfield at Barce was to be assaulted by two patrols from the LRDG. Sixty-four men crammed into five jeeps, and twelve Chevy trucks would first have to cross over 1,100 miles of desert just to reach their target. The attack aimed to destroy or damage as many Axis aircraft as possible and designed to be a straightforward assault relying on surprise and speed. A classic hit and run operation.
Operation against Italian ‘Fort’ at Gialo
The Sudan Defense Force, lead by LRDG patrol YI and Y2, was slated to attack the Italian garrison at Gialo a few days following the other ‘Agreement’ operations were initiated. The goal of this mission was for the British to secure Gialo as a rallying point for elements of the other ‘Agreement’ forces upon completion of their missions. The British did not anticipate much trouble in dealing with the isolated Italian soldiers at Gialo; this assumption would be an underestimation that would prove costly for the attackers.
Failure in the Desert
Following the narrative used by Peter C. Smith in his book Massacre At Tobruk, here are the results from the three ‘minor’ operations before reviewing what unfolded at Tobruk on September 13/14.
Benghazi
After their journey across the seemingly endless desert, Force Z rendezvoused near the Jebel mountains just outside of Benghazi. Advanced scouting indicated several freshly laid minefields in the area, a possible indication that the Axis was aware of an imminent attack. But the gritty soldiers of the LRDG and SAS did not travel this far to be deterred here, and the mission would carry on as planned.

Benghazi harbor, 1942.
In the early morning darkness of the 14th, several RAF Liberator Bombers attacked the Benghazi harbor. However, they achieved only limited success in damaging or incapacitating Benghazi’s defenders. The Force Z ground attack became lost on their way towards Benghazi and did not reach the outskirts until nearly 3:00 am.
The delay left only a few remaining hours of darkness before the dawn light destroyed Force Z’s nocturnal cover. The commandos finally reoriented themselves in the dark. Once on the correct trajectory towards Benghazi, they pushed their vehicles at high speed down the main road leading towards the harbor.
A few kilometers from their target, the British were forced to bring their vehicles to a halt on the darkened road as the force encountered a barrier blocking their progress. A survey of the area showed a mine field laid out on either side of their approach, leaving no way to maneuver around the obstacle. After a moment’s hesitation, a British soldier jumped out of his jeep to clear the obstruction. At almost the very moment he reached the obstacle to move it aside, automatic fire barked out at the British from the darkness. The commandos had fallen right into a well-concealed Italian ambush.
The SAS and LRDG soldiers scrambled back for cover as small arms fire ripped through the air around them. The British soldiers quickly responded in kind as they found themselves fully engaged against the Italians in a life or death struggle pitted in the early morning gloom of the desert. The British commandos opened up with their Vickers, which far outgunned anything the Italians were employing and raked fire back and forth towards the Italian lines.
But the British were shooting blindly into well-concealed fighting positions, and the Italian attack continued unabated. Several British vehicles erupted into flame as the Italian fire struck home. With the light from the burning jeeps illuminating the other vehicles, the Italian fire no doubt became more accurate, and the British position more precarious by the minute.
Taking withering fire, and with any chance of a surprise attack now gone, the British turned their surviving vehicles around and retreated towards the open desert. The Italians had stopped the British commandos, and now time was of the essence for their escape. With the imminent arrival of Axis airpower, anything caught in the open expanses of the desert faced almost certain death.
Retreating at full speed, the British commandos searched the skies forlornly for the harbingers of destruction they longed to avoid. To their dread, they spotted it. A handful of German Stuka dive-bombers, the scourge of the Polish and French campaigns, hurtled out of the skies upon their fleeing prey.
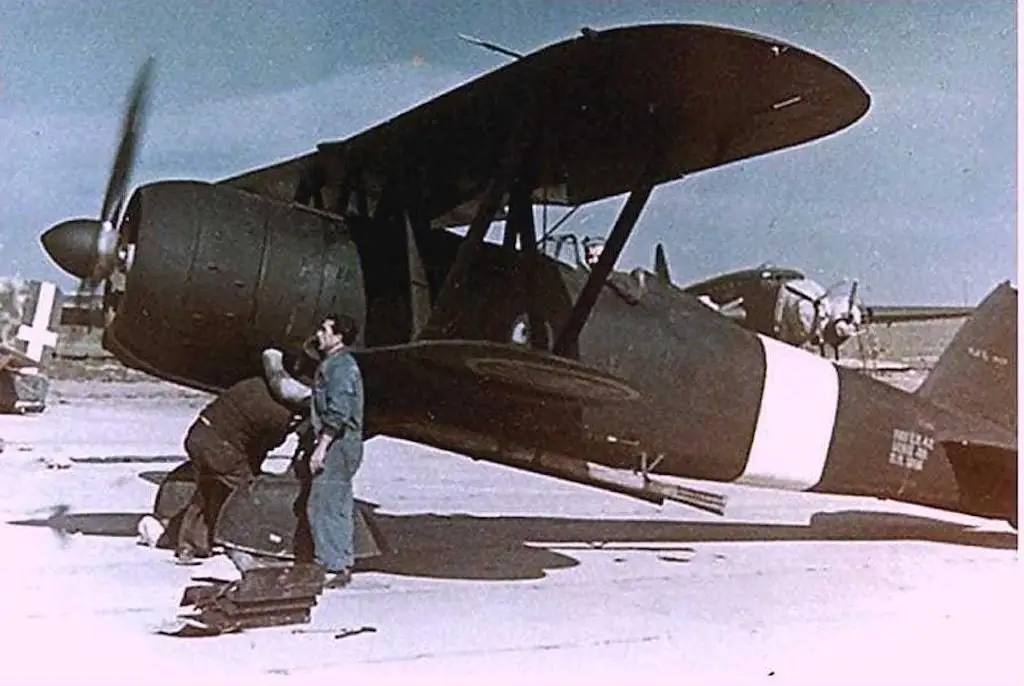
A Fiat CR.42 Falco in 1941.
Joining them in their pursuit of the British was a group of Italian Fiat CR.42 Falco’s, which was considered by some of the greatest biplanes ever created. Although practically obsolete at the dawn of the Second World War, the CR.42 proved that a biplane could still prove effective in modern battle when used in the right circumstances. And during Operation Agreement, the CR.42 did just that.
These attacking CR.42s and Stukas destroyed nine British vehicles. Their bullet and bomb ridden hulks left smoking in the desert. Several British vehicles were able to elude their airborne attackers as they scattered through the sand. The British commandos were able to regroup their forces once again. They spent the night hidden in a wadi in an attempt to avoid detection.
The next morning, one last British jeep arrived at the wadi to rejoin the column after spending the night hiding elsewhere in the desert. This jeep, however, had not come alone. An Axis pilot secretly tailed the jeep from a distance allowing him to track his quarry directly to the rest of the British force. Once the location of Force Z was relayed by the clever pilot back to the Axis airfields, several German and Italian planes attacked without mercy. It was a slaughter; eighteen jeeps and twenty-five trucks were destroyed by the swarming planes breaking the back of the British raiders.
Operation Bigamy was a complete failure. Those lucky enough to escape the CR.42’s and Stukas broke for their designated fallback position, Gialo, which, as mentioned earlier, was to be captured from the Italians. The Sudan Defense Force, which attempted to take Gialo, was likewise defeated by the Italian defenders. Thus the remnants of Force Z were obliged to retreat completely back into Allied held territory in Egypt.
Brace
Two patrols of the LRDG traveling the long trek across the desert in five jeeps and 12 Chevy trucks, made first contact with Axis forces on the 13th. The convoy encountered two small Italian L3 tankettes about five miles outside the Brace airfield. Avoiding a firefight, the British vehicles out-maneuvered the tankettes and sped towards the airfields at breakneck speed. The commandos, using the element of surprise, smashed through the “back” gate of the airfield and, like wolves amongst the sheep, moved in for the slaughter.
Several British jeeps pulled up towards a grouping of buildings and barracks. They proceeded to pour intense machinegun fire inside, pinning the Italians down. With the garrison neutralized, several other British vehicles raced between the parked planes, and using explosives and machinegun fire, destroyed approximately 15 Axis planes, while also damaging about 15 more. The British force, aware that time was limited, sped back out the way they came leaving the Italian airfield in tatters.
As the fleeing British convoy came back over the road, they ran smack into the path of two Italian tankettes that maneuvered themselves into a position to return fire on the nimble attackers. The British commando driving the lead truck, displaying guts that helped make the LRDG such famous soldiers, stepped on his accelerator and charged directly at the tankettes. The vehicle slammed head-on into the lead one.
Several British soldiers then leaped from the vehicle. They quickly tossed their grenades into the tracks of the two tankettes, disabling both. The commandos climbed back into their vehicles and sped away towards the desert, and a hopeful clean escape. It was not to be.
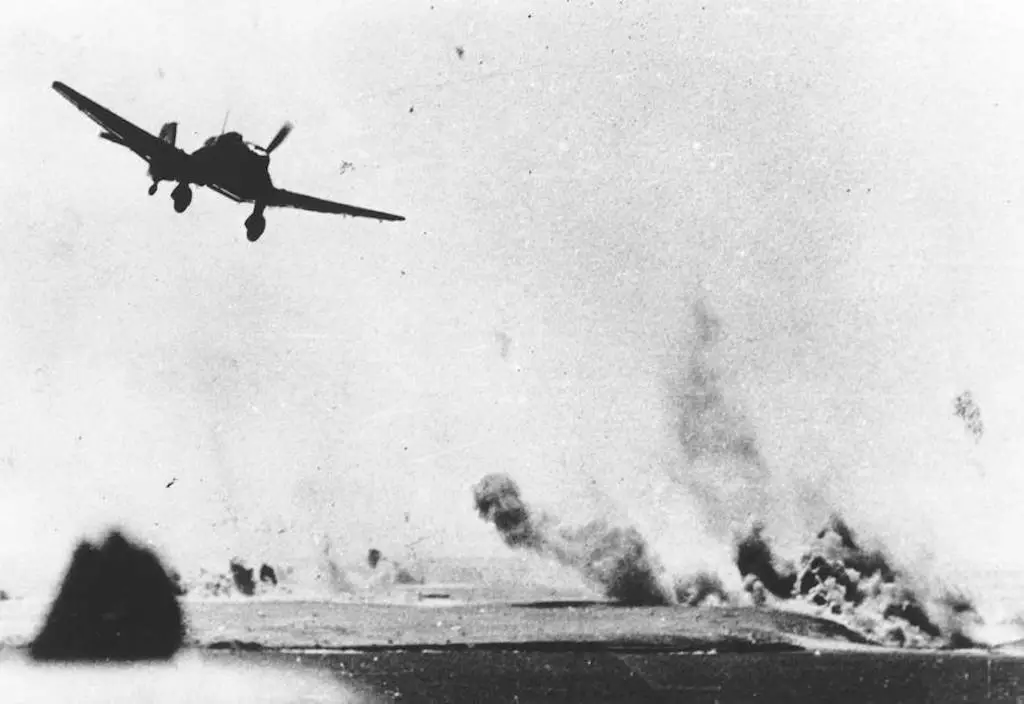
A low-level attack by a Luftwaffe Stuka dive bomber at Tobruk, Libya in 1941.
The British’s underestimation of the effect that Axis airpower would have on the raids was once again exposed. The gallant soldiers of the Brace raid would pay with their lives. A group of German Stukas located the column, and later by Italian aircraft, who pummeled the vehicles below. The aircraft destroyed fifteen of the seventeen vehicles in the column.
Dozens of men were killed and wounded, and even the lone ‘successful ‘Agreement attack carried a heavy toll for the triumphant.
Gialo
The British effort to seize the Italian outpost at Gialo, Libya began with the diversionary operation named Coastguard. It accomplished very little. A motorized element of the Sudan Defense Force feigned an operation near Sitra, which did nothing but waste fuel as the effort elicited no Axis response. The RAF contributed to Coastguard by sorting several planes to drop dummy parachutists into the empty desert to simulate an airborne assault, which likewise drew no reaction from the Axis.
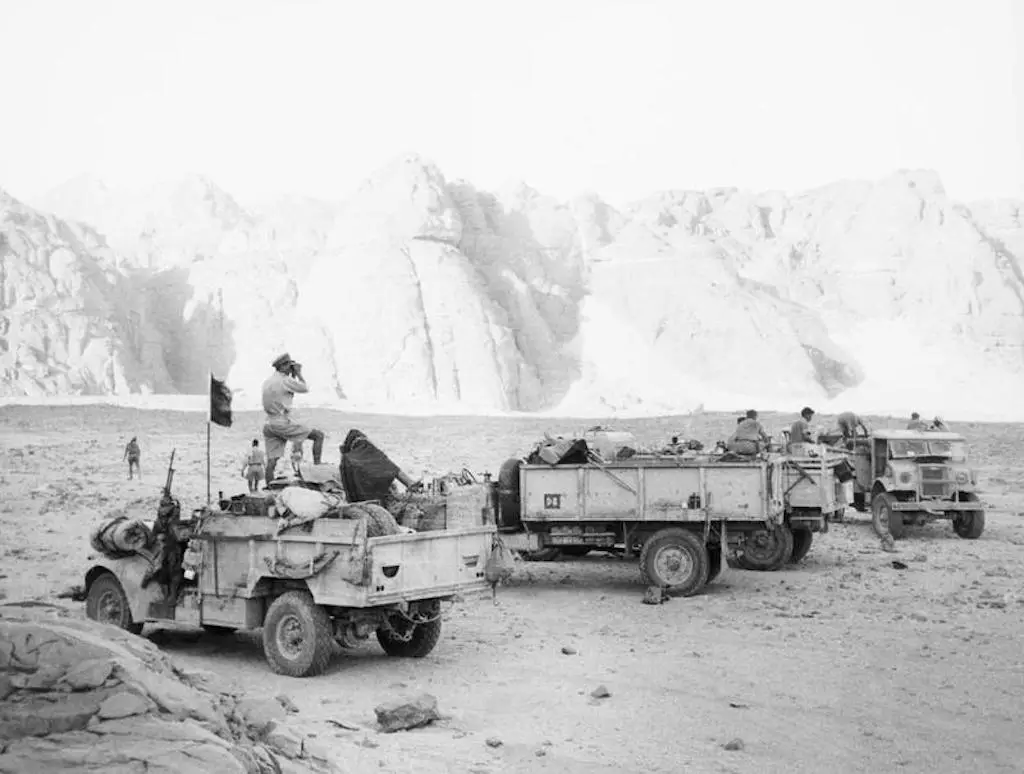
LRDG–SAS in trucks halted at the massive rock outcrop of Gilf Kebir during Operation Agreement. Image: Public Domain.
The attack against Gialo proper, spearheaded by LRDG patrol YI and Y2, commenced on the 15th. The Italian garrison included soldiers from the Pistoia Division and the 57th (LVII) Bersaglieri Battalion.
British soldiers approached the fort stealthily from the desert under cover of darkness. They launched a surprise attack that dislodged the Italian defenders from the west end of the fortification. They would not hold this small foothold for long.
Italian officers rallied their forces for a counterattack, charged back into the recently captured area, and engaged the British in a brief but intense firefight. The Italian response was well-organized and fierce, forcing the British to retreat before becoming overwhelmed. Gialo was once again firmly in Italian hands.
Because stealth and surprise had failed for the British, they next turned to firepower to seize their objective. Despite days of shelling, the Italians were able to weather the storm. They refused to yield their position to their attackers. The Italians struck back several times with air power in the form of the trusty CR.42, which on multiple strafing attacks, delivered a counter punch in support of their hard fighting ground forces.
By the 19th, the British realized the Italians intended to stand firm in Gialo. With reports of a mobile Italian force on the move from Agedabia, the British decided to call off the attack and retreated to Kufra. The 200 resilient Italian soldiers who fought them in the desert squashed their plan to use Gialo as a rallying point and temporary base of operation.
Tobruk
Force B (land assault group), passed several Italian and German sentry points without raising the slightest of suspicions as they made their way towards the harbor. Stealth and deception had paid off in penetrating the ‘outer’ defensive line, but the group’s luck was about to run dry.
The commandos approached the harbor to launch the initial phase of their mission. This phase included the elimination of the coastal guns defending the eastern side of the inlet and signaling the MTB’s ferrying the soldiers of Force C.
They discovered that they were not storming an enemy disorganized and reeling under the effects of an intense aerial bombardment, but quite the opposite. The British were converging on a stronghold stirred into action and readiness by the bombers of their own RAF.
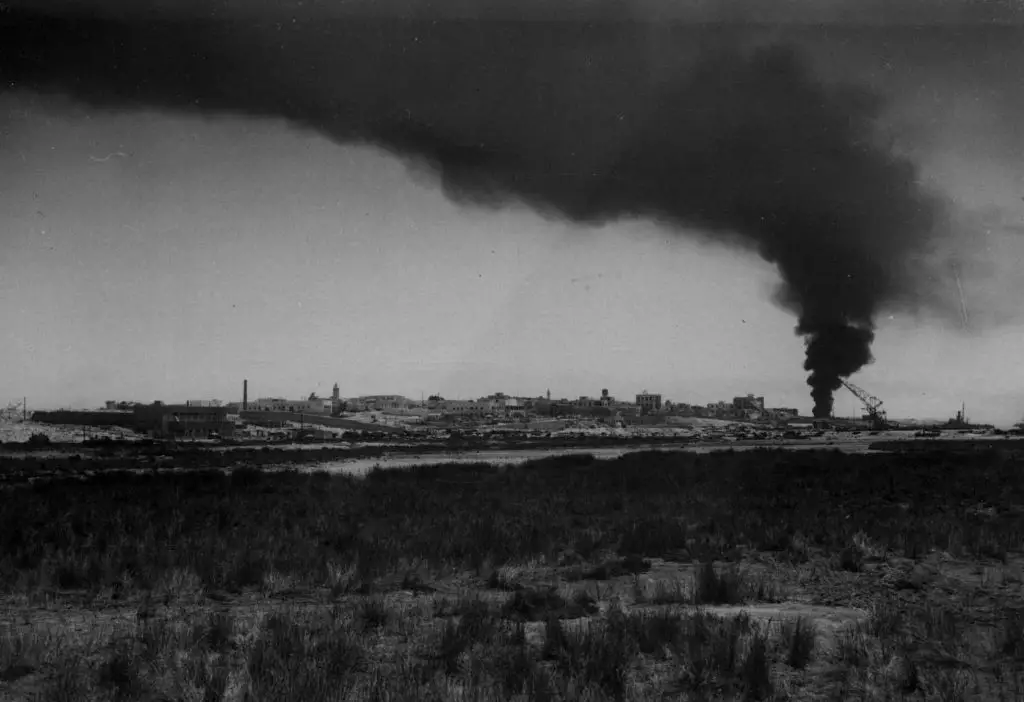
Tobruk harbor in 1942.
About 91 Halifax, Wellington, and Liberator bombers began a prolonged bombing run against Tobruk late on the night of the 13th. Despite the thousands of pounds of explosives that dropped on the installation, it achieved minimal damage. Instead of striking a mighty opening blow designed to put the Axis troops on the wrong foot, the harbors defenders were now in a state of high alert.
Force B’s mission soon began to unravel with deadly consequences. The Commandos split up on foot into several groups, each tasked with separate goals. While advancing, some of the commandos silently killed several isolated Italian guards. Also, they took out a German machinegun team.
But the British experienced costly delays in keeping to their precise operational time schedules. Minefields, darkness, and the need to take circuitous routes to avoid heavy patrols slowed down the commando advance. These delays proved costly in the mission to deploy the signal lights to notify Force C’s MTBs to commence landing. The lights did not deploy until well after the designated time, which added to the problems Force C was experiencing in reaching their landing zone. As it turned out, only two of Force C’s MTBs were able to land and disembark their troops in the correct area.
Force B’s attack on the large Italian gun emplacements also failed. A handful of AA positions were successfully eliminated, along with a 105mm gun located west of Marsa Umm el Sciausc. Still, the British were unable to subdue all of the large coastal guns. An Italian 152mm gun, well-protected behind concrete reinforcements, was held by its Italian gun team against the British soldiers tasked with eliminating their position. The Italians defensive stand compelled the commandos to abandon the attempt, which allowed several of the Axis’s “big” guns to remain operational to defend the harbor.
Other elements of Force B captured a blockhouse they intended to use as a makeshift HQ. Alerted to the British’s presence, a sizable Italian force organized a counterattack against the occupied structure. After a prolonged gun battle, the British commandos abandoned the blockhouse and remounted their vehicles in an attempt to escape. Most of these trucks were soon disabled as they ran into an ambush set up by the San Marco marines.
The quick response of the San Marco marines had trapped the British commandos. As the Italians pressed their attack, the number of causalities the British sustained increased. One of the British to fall in this fight was Lt.Col. Haselden, mortally wounded from a well-thrown grenade by one of the San Marco marines.
A handful of German troops soon joined the Italians. The British soldiers, were low on ammunition and facing an ever-increasing number of enemy opponents. They broke off into small groups in an attempt to sneak back to the beach under cover of darkness to make their escape. Most would not get far. Axis troops, led by the San Marco marines, killed, wounded, or captured the valiant yet reeling British soldiers in the surrounding perimeter. By the early morning of the 14th, Force B was no more.
Force C was severely hampered by Force B’s inability to timely signal the MTB’s per the mission requirements. The delay in relaying the signal and the operational coastal guns added to the difficulties the MTBs experienced.
Force C’s primary obstacle was the inability of their MTBs to stay in contact with each other during the final leg of their journey to the assault zone. During most of the trip to Tobruk, the British piloted their MTBs at a plodding pace to allow the ships to stay in contact. But as they approached Mersa Umm Es Sciausc and the designated attack time, they turned south towards the shore and pushed the vessels at nearly top speed.
As the MTBs began this frantic charge towards the inlet, the group became separated and disorganized as they raced forward. As discussed earlier, the degree of chaos was such that only two of the MTBs landed in the correct area to drop off their load of Fusiliers. The other MTBs, unable to disembark their troops, moved up and down the coast forced to avoid probing Axis searchlights and the fire that inevitably followed from the shore batteries.
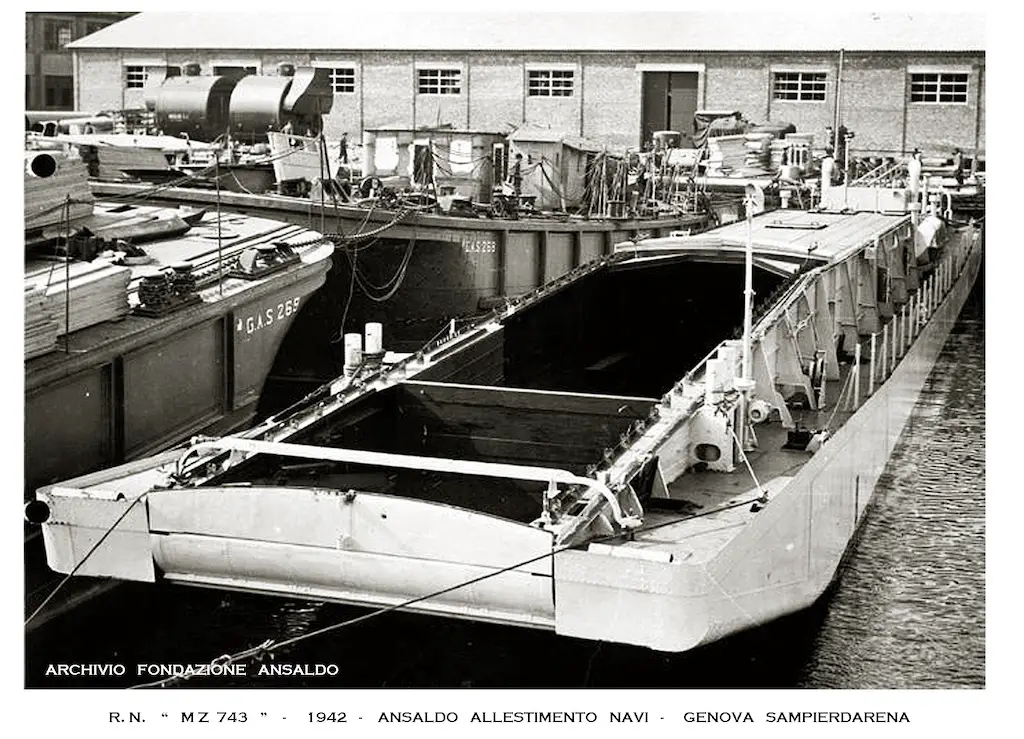
An Italian Motozattera (1942).
Several Axis ships added their firepower to the defense. A handful of Italian landing craft (motozattere) including MZ 756 and MZ 759, opened up with their 76mm/40 cannons and 20mm machineguns. Most were firing blindly into the dark, but still provided added support to the defense.
Then the Macchis arrived. Swarms of Italian Macchi C.200 Saettas attacked both the MTBs and the three large motor launches that made up the group. Relentless in their attack, the Saettas struck the British vessels with their 12.7mm Breda machine guns, holing the boats and taking the lives of several men on board.
Powered by its 870 hp Fiat A.74 R.C. radial engine, the Saettas dived furiously upon the British vessels. Major Lorenzo Viale led the Italian 13° Gruppo Assalto on numerous runs over Mersa Umm Es Sciausc, dodging AA fire emanating from the darting MTBs below. The Italian war birds sank two of Force C’s three motor launches. They sent the third limping back to Alexandria as a virtual wreck.
Several German Stukas and Junkers JU88’s would later join the Italian Saettas on this attack. Three MTB’s subsequently sank in the melee, at the cost of one JU88 that was brought down by a Bren gun aboard one of the MTBs.
The stout Axis defenders of Tobruk’s eastern flank would not yield, and Force C practically became decimated for its efforts. The few troops it managed to land were overwhelmed onshore by the marines of the San Marco Regiment. With its transports ravaged, the surf was awash with both wreckage and bodies of the brave British soldiers who perished.
On the western end of Tobruk, Force A likewise began their portion of the mission with an auspicious start. The submarine HMS Taku, carrying an advanced tactical landing party, lurked several miles offshore of Mersa Mreira on the night of 13/14 September. Battling choppy seas, the crew was unable to launch its two small ‘recon’ boats intended to shuttle the advance party to the designated landing area on the shore. Without the beach adequately marked, the subsequent landing craft carrying two waves of Royal Marines would be forced to navigate their way ashore practically blind.
The Royal Marines would accept this hazard and attempted their landing despite this setback. Fighting the same rough conditions that hampered Taku, destroyers HMS Zulu and HMS Sikh moved to within two and a half miles of the shoreline. It was the early morning of the 14th, and the Harbor facilities in the distance loomed ominously as they were by this time illuminated by the fires started from the RAF bombing. Searchlights also swung periodically across the surface of the water, probing for the attackers. There would be no surprise landings near Mersa Mreira.
The first wave of marines moved landward. Three sturdy powerboats, each pulling two large barges, crammed with marines skipped through the choppy seas in an attempt to run the gauntlet of fire they knew awaited them. The destroyers pulled back as the ‘transports’ of the first wave moved out into the darkness. Spotlights and automatic fire emanating from the shore discovered the vessels. Soon after that, death would find its occupants as well.
A portion of the marines made it ashore, only to quickly discover that they had arrived at the wrong landing zone. The groups found themselves not at Marsa Mreisa. Instead, they landed at the beaches of Marsa El Auda and Marsa El Krisma, which lie approximately five kilometers west of the intended landing zone.
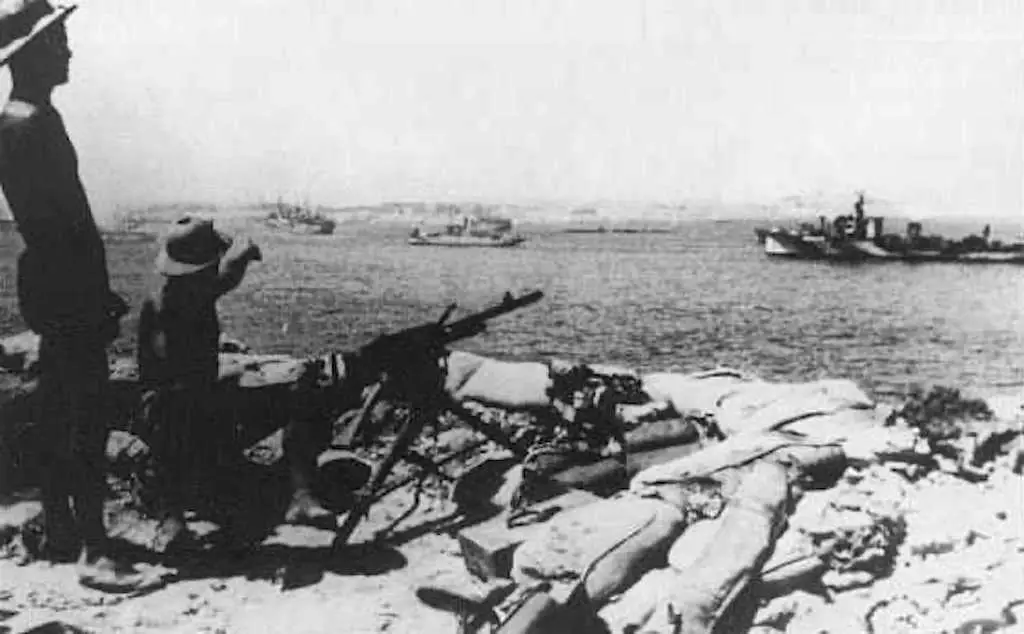
A Tobruk defensive position during Operation Agreement.
Automatic weapons joined the large coastal guns in punishing the British powerboats and barges still in the water. Off in the distance, the two destroyers changed coursed and moved back inland to retrieve the barges and assist a disabled powerboat set adrift. It was about this time that an analysis of the situation concluded the British mission was floundering beyond salvage.
They called off the operation. With dawn approaching, Sikh moved further inland. They came to within a suicidal close distance of less than a mile from the shore, to help receive as many marines as it could before fleeing back to sea.
German gunners manning the numerous 88’s found their range on the approaching ship, and a well placed shot disabled the massive destroyer. Round after round found its mark on the Sikh and, despite efforts by sister ship Zulu to tow her to safety, Sikh eventually floundered and sank.
Zulu had no choice to abandon her sister ship as she was likewise absorbing multiple hits from the Axis shore batteries. After firing numerous rounds from back at her relentless attackers, Zulu turned seaward and began her retreat.
Hundreds of British marines and sailors now found themselves afloat in the sea, clinging to debris from the vanquished Sikh. Many of these men attempted to tend to their wounded comrades while struggling to keep their heads above water.
The Italian Macchis would soon make their presence felt on this side of the harbor as well, as several of the planes came in low over the water to strafe the bobbing figures below. Bullets churned the sea around its drifting, helpless inhabitants as the British had nothing to hurl back at their attackers except shouts of indignation.
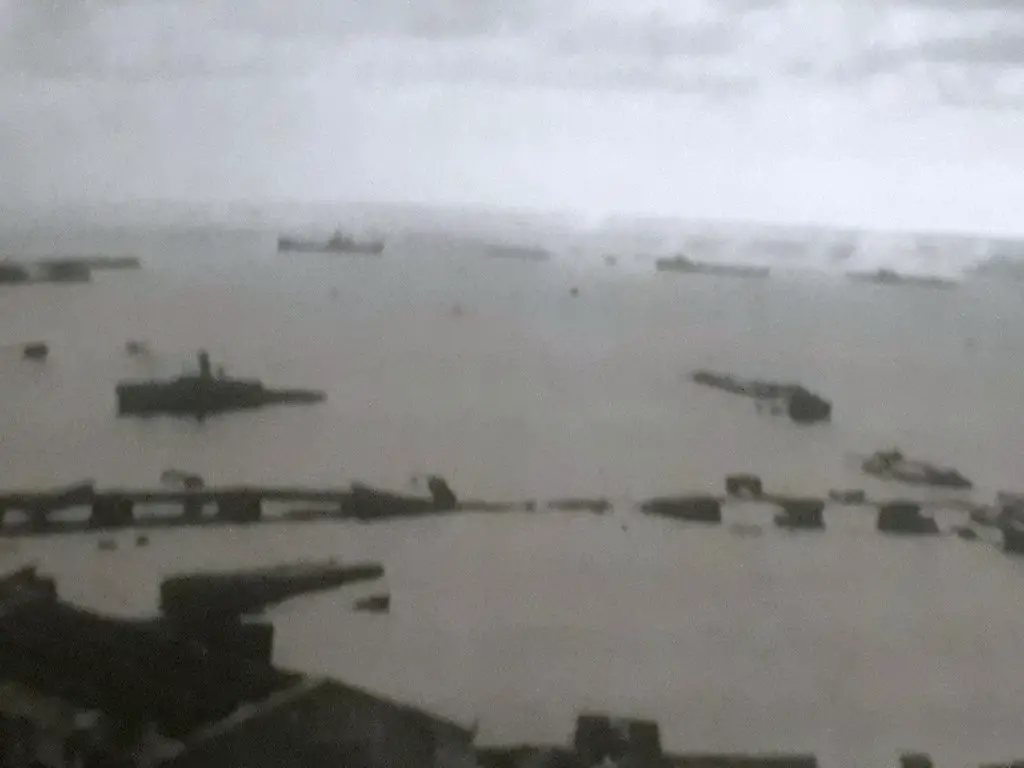
The Italian torpedo boats Castore and Montanari firing upon British MTBs at Tobruk harbor, part of Force A, Operation Agreement, 14 September 1942. Image: Public Domain
Soon after the Sikh slipped below the surface, several German and Italian vessels, including the torpedo boat Castore, pulled alongside the scattered debris to rescue the survivors. For these men, the ordeal was over. Others fought on.
British Royal Marines now on the beach fought for their lives. The marines quickly realized they were not going to receive additional support. With the beating their destroyers were taking offshore, they knew there would be no retreat back to sea. Their only chance would be to fight their way up the bluff leading to the open desert. The marines quickly overwhelmed several Italian positions near the base of the incline and subsequently took these men prisoner. However, the British discovered that the higher they traversed, the tougher the fight became.
British Marines, using bayonets and small arms, battled their way up to the summit. The Italian defenders they faced were not of the same quality as their San Marco compatriots. However, they still were able to thin the marines’ ranks to the extent that only 17 reached the top.
The British, greatly outnumbered, concluded that escape would be their only viable option. Spotting a small group of caves, the men slipped inside, intending to hide out until dark. But the British had been located entering the cave, and soon they were surrounded by a large group of Axis defenders. Surrender would be inevitable, and the marines marched off into captivity.
Back out at sea, the HMS Zulu was wounded but could make 30 knots as she attempted to make her way to the safety of their port in Alexandria. She would not make it. German bombers sank the Zulu, along with the light cruiser HMS Coventry. The sinking of these two naval vessels was one last devastating loss suffered by the British during Operation Agreement. It served as a coda for one of the most ill-advised raids in the entire Second World War.
Outcome
The raid on Tobruk was almost finished by mid-day of the 14th. The Italians and Germans conducted final sweeps throughout the day over land, air, and water to complete the rounding up of any stragglers, and no further threats loomed. The tally of losses suffered illustrate the truly one-sided nature of the confrontation. The British led forces suffered nearly 800 casualties, lost a cruiser, two destroyers, and several other smaller vessels. The Axis accomplished this for the loss of fewer than 70 men and 30 aircraft.
As in previous joint military undertakings between the Italians and Germans, the “official” version of the event from each side surrounding Operation Agreement differed slightly. Both parties were perhaps guilty of diminishing the contributions put forth by the other. Likewise, they also played up their own accomplishments.
What cannot be denied is that the airmen, sailors, marines, and soldiers of both Axis militaries acted swiftly and decisively to smash the British attack. They protected two of their most critical supply points in the North African theater. The victory obtained during Agreement would be one of only a handful remaining for the Axis in North Africa but served to prove there was still plenty of fight left in their ranks.
For the Allies to claim victory in this theater, they would have to give a much better showing of themselves in the months to come. They would have to defeat some of the best soldiers that Germany and Italy produced throughout the war.
Note: Special thanks to Dennis Hussey for editing the article. I appreciate the time and work you put into reviewing, and could not have completed the article without you.
References:
On Amazon: Massacre at Tobruk: The British Assault on Rommel, 1942 (Stackpole Military History Series)
On Amazon: Desert Raiders: Axis and Allied Special Forces 1940–43 (Battle Orders Book 23)
Italian Navy & Air Force Elite Units & Special Forces 1940-45: Piero Crociani