Background on the Battle of Mersa Matruh
The Battle of Mersa Matruh, fought between 26-29 June 1942, was the last significant victory for Rommel’s troops in the Libyan-Egyptian theater. The 7th Bersaglieri Regiment, 32nd Combat Sappers Battalion, Littorio Armored Division, Brescia and Trento Divisions played an important role in this victory.
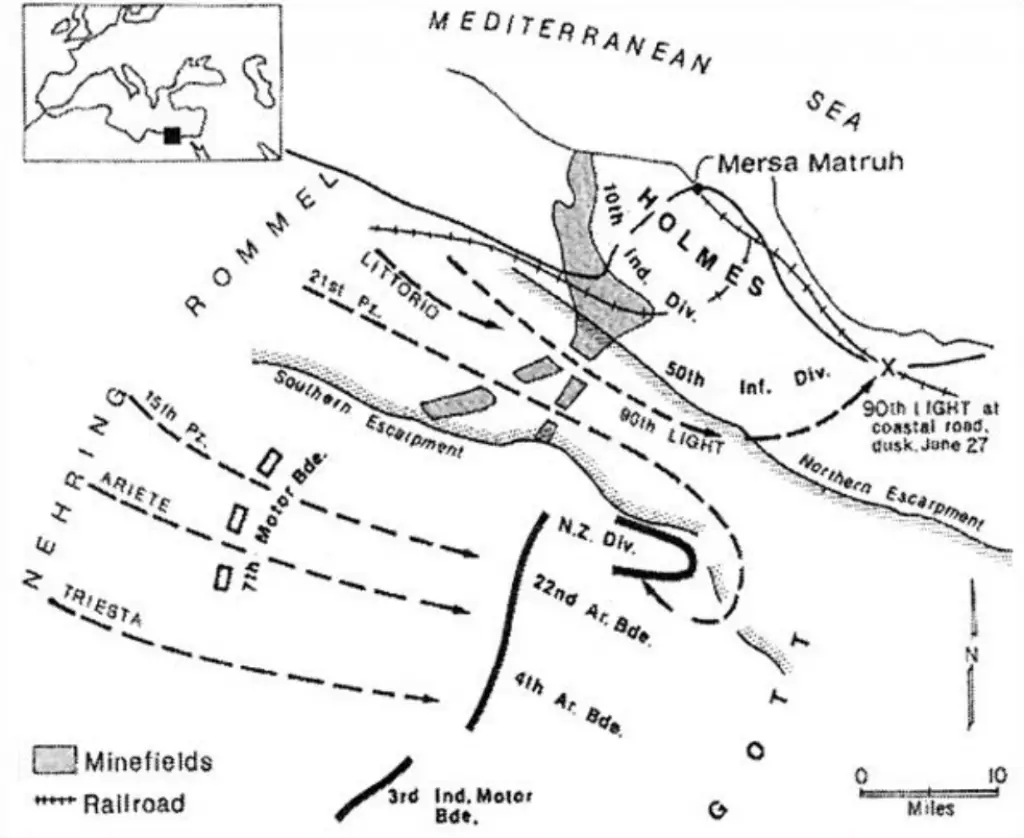
Battle of Mersa Matruh map.
Reckless Audacity
After Major-General Hendrik Klopper’s surrender at Tobruk, both sides were very much exhausted and much reduced in numbers. Nevertheless, on 23 June 1942, lead elements of the Deutsche Afrika Korps sallied into Egypt. Field Marshal Erwin Rommel’s plan was to strike at the eastern end of the southern escarpment south of the Mersa Matruh position, where the 1st British Armored Division and New Zealand Division of Lieutenant-General William Gott’s XIIIth Corps were. The strike would force a gap through which the 15th Panzer, the Italian Trieste, and Ariete Divisions could pass, and then completely cut off and encircle Mersa Matruh.
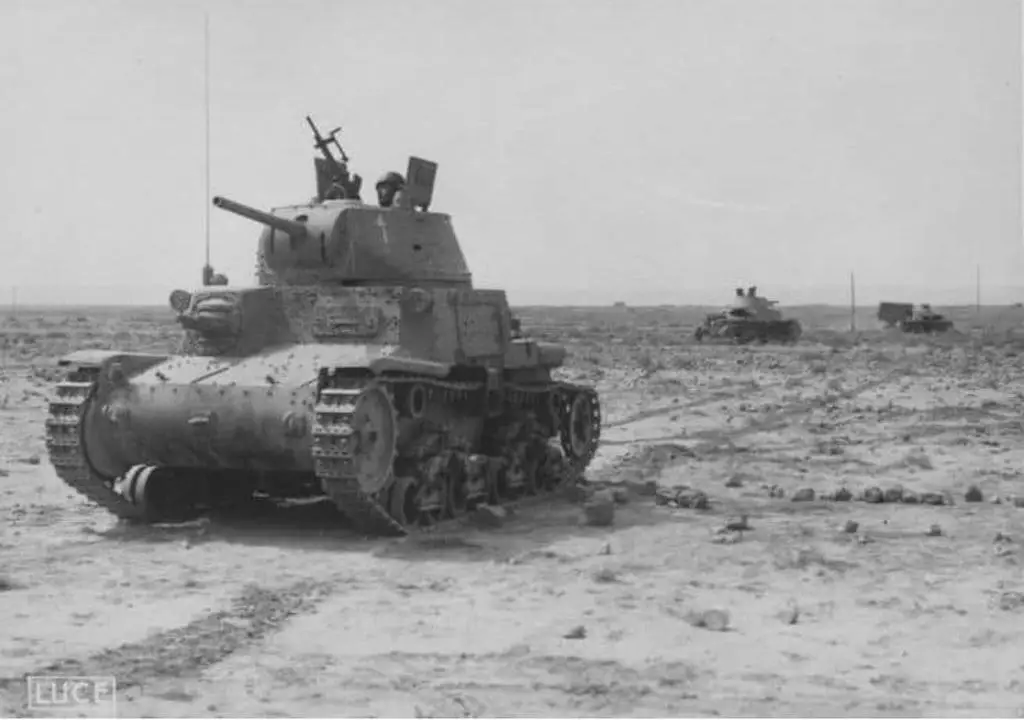
Carro Armato M14/41 in North Africa.
By now. most of Rommel’s troops began utilizing captured British vehicles as their own vehicles had worn out. The Axis forces consisted of the 15th and 21st Panzer and 90th Light Divisions, and the Italian Brescia, Trento, Trieste, Ariete and Littorio Divisions. The Germans only had 44 operational tanks. The Italian forces could only muster fourteen M14 tanks when they reached Mersa Matruh. To complicate matters further, the three German divisions had no more than 2,500 infantry still on their feet. But the Italian divisions had 6,000 infantry. Mike Stolmeyer describes the engagement at Mersa Matruh as:
…surely one of the most incredible in military history. The outcome, given the relative strength of the opposing forces and the desperate situation the weaker army found itself in, due to its commander’s reckless audacity, is mind-boggling!
The British-led Commonwealth Army had eight infantry brigades in position, with their 1st British Armored Division amassing 160 tanks, of which 60 were the powerful Grants.
Shelled From All Sides
Axis troops had arrived at Mersa Matruh on the afternoon of 26 June; consisting of motorized infantry and artillery units from the Brescia and Trento Divisions. Before dawn on Saturday 27 June, the 90th Light Division made a series of attacks against the 9th Battalion Durham Light Infantry position, about 27 kilometers (seventeen miles) south of Mersa Matruh. They captured, after some bitter fighting, some 300 British troops. Taking up positions 40 kilometers (25 miles) south of Mersa Matruh, the New Zealander force obtained a report indicating a large enemy armored force approaching Minqar Qaim, where the 2nd New Zealand Division was. The Brescia and Trento Divisions undoubtedly played an important role in the battle. The Mersa Matruh positions came under heavy artillery fire. A British soldier, Les Davies recalled:
You will have read about the boxes formed in the desert. The loss of Tobruk and the fast-moving battles we have had. Well the last one of all, Mersa Matruh, was the worst. I will never forget it. We were in a box and Jerry shelled from all sides and continued day and night. We had to break out at the finish or be taken prisoner.
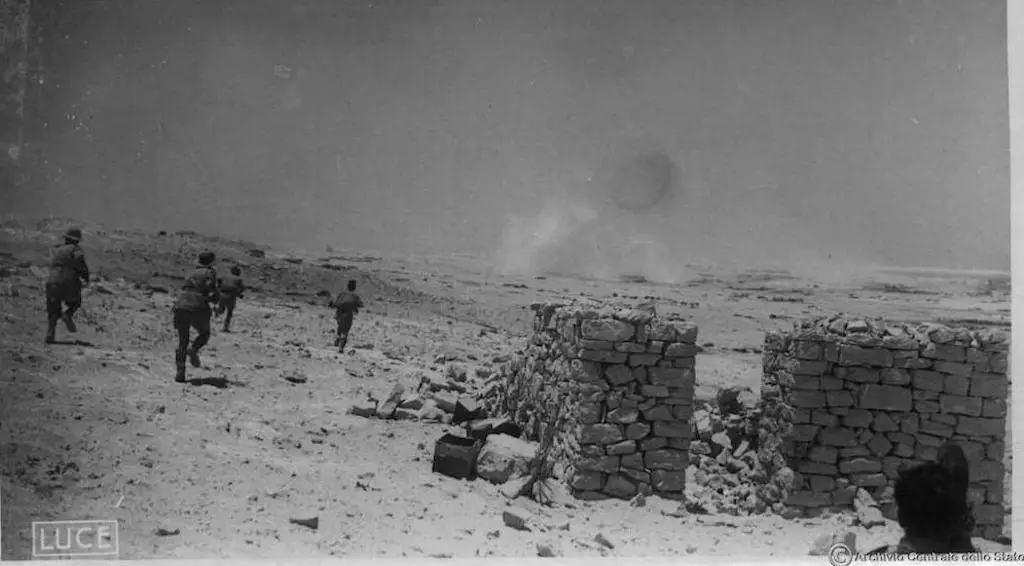
Regio Esercito in action, June 1942, Mersa Matruh.
S. D. Verma, a Major in the 10th Indian Division, recalled how they kept receiving conflicting reports and orders:
One day it would be that we were to stay and fight to the last man and last round. The next day’s rumors would announce that we would have to make a breakout.
A Very Daring Officer
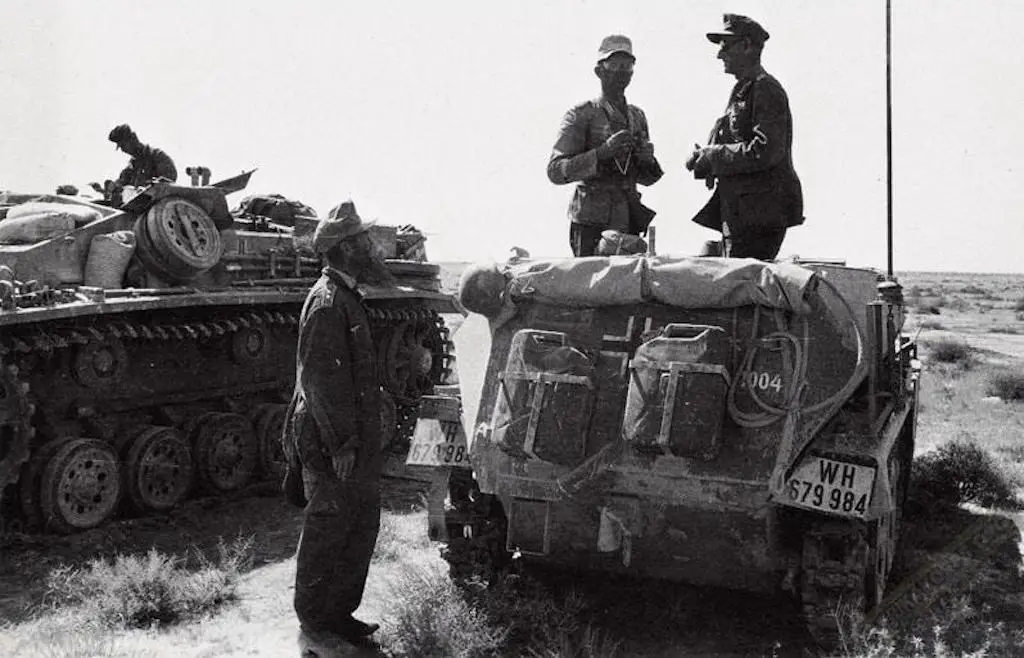
General Ulrich Kleemann, German 90th Light Division, speaks to a photographer on a SdKfz. 250 half-track command vehicle.
Meanwhile, General der Panzertruppe Ulrich Kleeman, took the 90th Light Division around the southern flank of the 10th British Corps. The 90h Light Division cut the coastal road about thirty kilometers east of Mersa Matruh. A recent historian of the Deutsche Afrika Korps, Samuel W. Mitcham, notes:
Ulrich Kleeman led the 90th Light through some of the worst fighting of the North African war, including the battles of the Gazala Line, the Cauldron, Bir Hacheim, the capture of Tobruk, and the invasion of Egypt. From an authorized strength of 15,000 men, the 90th Light gradually reduced to a strength of fewer than 1,500 troops. A very daring officer, Kleemann drove east with almost reckless abandon and cut off the British X Corps (10th Indian and 50th Infantry Divisions) east of Mersa Matruh on June 27. This is despite the fact he had only 1,600 men at the time, was outnumbered more than 10 to 1, and was 15 miles from the nearest Axis unit.
No Wish to Share Klopper’s Fate
On the night of 27 June, Gott decided in view of the condition of the New Zealand Division, which had been weakened, more by artillery fire than by direct enemy action, to withdraw to Alamein. Christer Jorgensen notes,
General Freyberg, the commander of the New Zealand Division, had insisted on this as he had no wish to share Klopper’s fate dismal fate at Tobruk.
At the very least, as Tim Rowe observes,
The New Zealand Division became encircled by nightfall. Ammunition was down to 35 rounds per field gun. The Division’s capacity to resist a further attack was very much in doubt.
Noel F. Wootton gives an account of the period in the New Zealand Division:
We were soon under enemy artillery fire, and during the later part of the afternoon, while making my way to our brigade H.Q., I observed a small group of engineers laying a protective minefield in front of our infantry positions. Clearly visible to the enemy, they soon came under heavy fire and suffered casualties. From seemingly nowhere an American Field Service ambulance appeared, heading directly into the danger area. Some of the casualties were obviously beyond help, but the others were quickly loaded aboard and rushed to the nearest aid post.
The whole of Lieutenant-General William Holmes’ Xth Corps, encircled at Mersa Matruh, could have withdrawn on this day. But hope existed that the 1st Armored and New Zealand Divisions would come to their rescue. News received at 0430 hours on 28 June disclosed hat the XIIIth Corps was in full retreat. Their southern flank was now open. With XIIIth Corps in some disarray, Rommel sent his 21st Panzer Division to pursue the British and overran elements of the 29th Indian Brigade.
Dash for Freedom
An attempt to break out of the Mersa Matruh position occurred during the night of 28 June 1942. By this time, Bersaglieri troops of Xth and XXIst Infantry Corps reinforced the 90th Light Division. Groups of the 10th Indian Division at the head of Wadi Nagamish came under heavy tank and machine-gun fire from the Littorio Armored Division. But certain parties of British and Indian troops took advantage of large gaps existing in the Axis lines and managed to escape. Les Davies takes up the story:
The next day we reformed and got ready, it was Sunday. Shells were coming over by the dozen and Jerry was closing in on us. So as soon as it was dark we made our mad dash to freedom and at a dear cost. Hell was let loose, he knew we were coming out. We broke the way through. Trucks burning, men killed and wounded and screaming for help, we could not stop as tracer bullets came flying through us and tanks knocking the hell out our trucks.
As Mitcham notes:
Fortunately for Kleeman, the British did not try to break out until the following evening, and, by that time the 90th became reinforced by elements of the Italian X and XXI Infantry Corps. Only 60% of the British corps escaped in the confused breakout. The next day, Kleeman and the Italians captured Mersa Matruh, along with a rearguard of 6,000 and 40 destroyed tanks.
Outstanding Valor
Italian combat sappers cleared gaps in the minefields slowly because of heavy artillery fire, and at dawn supporting infantry moved up. Colonel Ugo Scirocco’s 7th Bersaglieri Regiment finally broke into the British defenses. At 0930 hours, they captured the 6000 remnants of the Xth British Corps, along with large quantities of supplies. About the same time, the 21st Panzer Division intercepted another British column retreating to the east, capturing another 1,600. At 1045 hours on 29 June the Panzerarmee Afrika reported that:
The fortress of Marsa Matruh strengthened by installations organized in depth in the outlying area and by numerous minefields was taken by storm in the morning hours of 29.6 by 90 Lt. Div. in the face of stubborn enemy resistance.
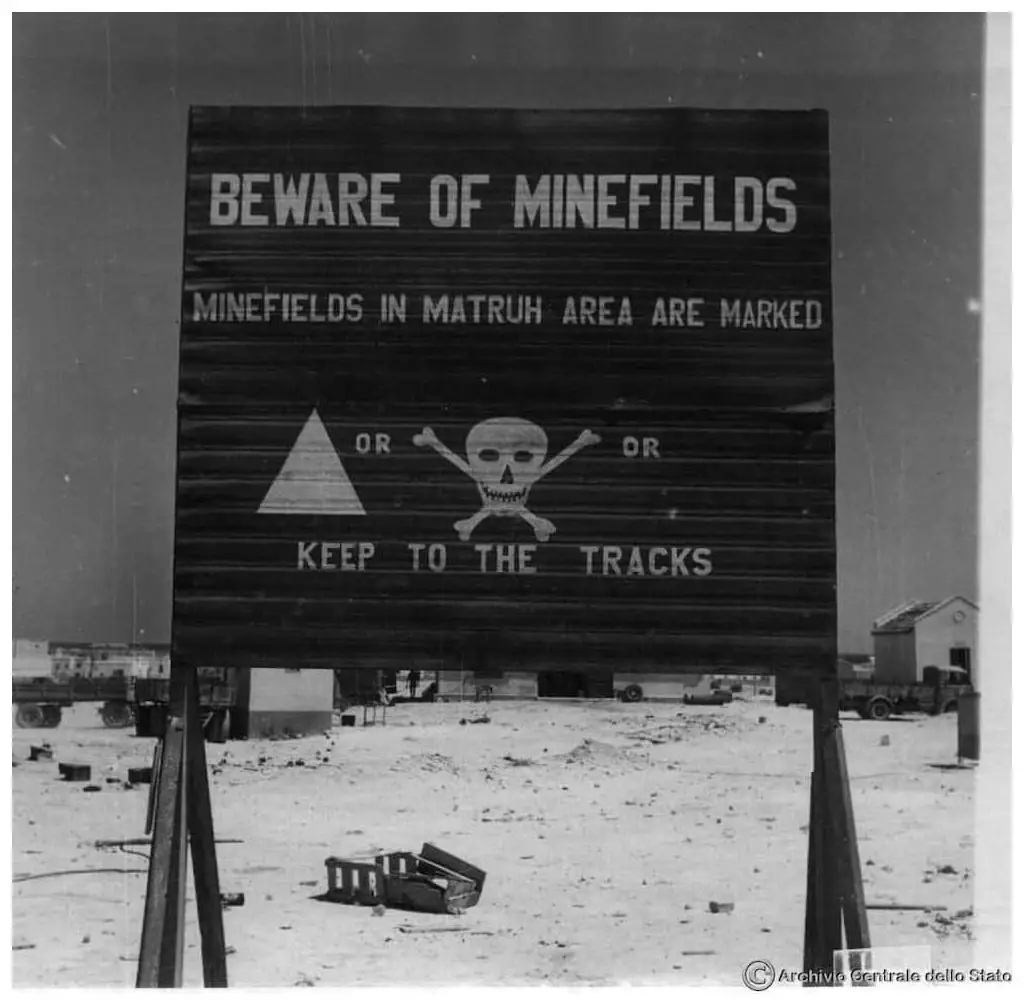
A sign warning of the a minefield in Mersa Matrouh. Image credit: Archivio Centrale dello Stato.
In reality, the 10th and 11th Battalions of the 7th Bersaglieri Regiment had broken into the port of Mersa Matruh. Thanks to the outstanding valor of the Bersaglieri, Kleeman’s 90th Light Division had overwhelmed the positions that normally would have required more numerous troops.
Additional References:
Battle of Mersa Matruh: Historical Overview by Mike Stolmeyer,
BBC-WW2 People’s War-Letter Home: From Mersa Matruh by Les Davies,
Gentlemen of the Raj: The Indian Army Officer Corps, 1817-1949 by Pradeep Barua,
Steve Weir: New Zealand’s Master Gunner by Tim Rowe
Healers in World War II: Oral Histories of Medical Corps Personnel by Patricia W. Sewell
Battle Report of Panzer Armee Afrika for 29 June 1942.